How to Patch Drywall, From Small Holes to Large Repairs
Step-by-step methods for nail holes, doorknob holes and larger damage, plus how to get a smooth finish.
In this guide
Key takeaways
- Small holes only need spackle. Medium holes need a patch. Large holes need a new piece of drywall.
- Thin coats, feathered wide, give the smoothest finish.
- Let each coat dry fully before sanding or adding the next.
- Prime before painting so the patch doesn't show through.
Introduction
Holes in drywall happen: picture hooks, doorknobs, moved furniture and plumbing repairs. The good news is that most drywall damage can be repaired at home with a few inexpensive tools and some patience.
The right method depends on the size of the hole.
Advertisement
Tools and materials
- Lightweight spackle for small holes, or joint compound for larger repairs
- Putty knives: a narrow one (2 to 4 inches) and a wider one (6 inches or more)
- Self-adhesive mesh patches for medium holes
- A scrap of drywall, a drywall saw and a utility knife for larger holes
- Fine sanding sponge or 120 to 150-grit sandpaper
- Primer, paint and a small roller or brush
- A drop cloth and a dust mask
Small holes: nails, screws and dents
- Lightly sand any raised edges around the hole.
- Press spackle into the hole with a narrow putty knife.
- Scrape across the surface so the spackle is flush with the wall.
- Let it dry, then sand lightly and wipe off the dust.
- Add a second thin coat if it has shrunk, then sand again.
For a popped drywall screw or nail, drive a new screw an inch or two away to secure the drywall, then fill both spots.
9 more sections · 8 min read
Continue reading this guide
Watch a short ad to read the rest of this guide. You'll only need to do this once for this guide.
Not now, show me another guide →Medium holes: up to about 6 inches
- Trim loose paper and crumbled edges with a utility knife.
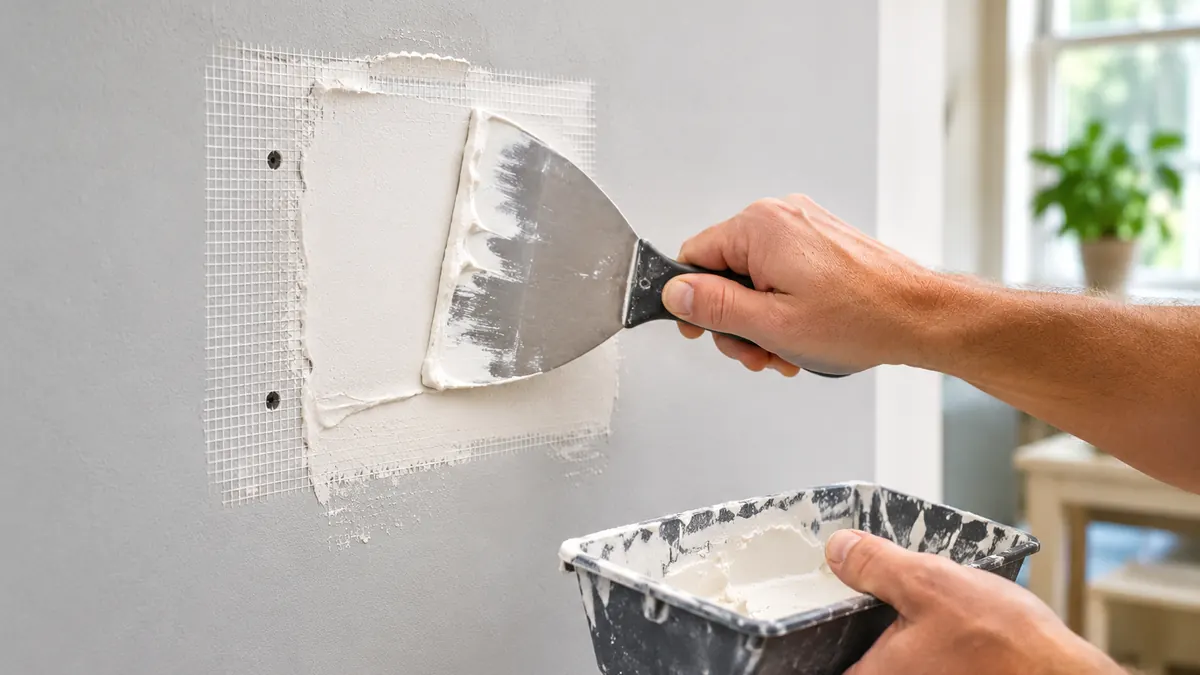
- Stick a self-adhesive mesh patch over the hole, larger than the hole on all sides.
- Spread a thin coat of joint compound over the patch with a wide knife, extending a few inches past the edges.
- Let it dry fully, then sand lightly.
- Apply a second, wider coat, "feathering" the edges so they blend into the wall.
- Repeat with a third thin coat if needed, then sand smooth.
Large holes: a new piece of drywall
- Draw a square or rectangle around the damage and check inside the wall for wires and pipes before cutting.
- Cut out the damaged section with a drywall saw.
- Screw wood strips (furring strips) inside the opening above and below the hole to support the patch.
- Cut a new piece of drywall the same thickness to fit the opening and screw it to the strips.
- Tape the seams with paper or mesh tape and joint compound.
- Apply two or three thin coats, each wider than the last, sanding lightly between coats.
Advertisement
Getting a smooth finish
- Thin coats are better than thick ones. Thick coats crack and take longer to dry.
- Feather the edges. Each coat should be a little wider than the last, so the repair blends in.
- Use light to check. Shine a flashlight across the wall at a low angle to spot ridges and dips.
- Don't over-sand. Sanding through the paper face of the drywall makes a rough surface.
Matching texture and paint
If your walls have texture, such as orange peel or knockdown, spray texture cans can help blend the patch. Practice on cardboard first.
Always prime the patch before painting. Joint compound absorbs paint differently from the rest of the wall, and an unprimed patch often shows as a dull spot. Painting the whole wall, corner to corner, gives the most even result.
Advertisement
When to call a professional
- Water damage, staining or soft drywall, which can signal a leak that needs fixing first
- Any sign of mold
- Large areas of damage, or ceiling repairs
- Holes near electrical boxes or with wiring you can't safely work around
Fixing cracks and corner damage
Hairline cracks often appear at the corners of doors and windows as a house settles. Widen the crack slightly with a utility knife, cover it with paper or mesh tape, then apply two or three thin coats of joint compound, feathering each one.
Dented outside corners usually have a metal or plastic corner bead under the compound. If the bead is bent, it can often be tapped back into shape or cut out and replaced, then covered with compound.
Inside corners that crack can be retaped with paper tape folded down the middle, pressed into a thin bed of compound.
Advertisement
How long the repair takes
Most of the time in a drywall repair is waiting for compound to dry. A small nail hole can be finished in a day. A medium patch with three coats may take two or three days, depending on the product and humidity. Setting-type compounds, which you mix from a powder, harden faster and are useful for deeper repairs, but you need to work quickly once mixed.
Common mistakes to avoid
- Applying one thick coat to save time, which often cracks or sinks as it dries.
- Sanding before the compound is fully dry, which tears the surface.
- Making each coat the same width, which leaves a visible ridge around the patch.
- Skipping primer, so the patch shows through the paint.
- Not wearing a dust mask. Drywall dust is fine and spreads easily, so a damp sponge can also help keep dust down.
Advertisement
Conclusion
Most drywall damage can be fixed at home: spackle for small holes, a mesh patch for medium ones and a new piece of drywall for large holes. Take your time with thin coats, feather the edges, prime before painting and the repair should be hard to spot.
Common questions
How long does drywall compound take to dry?
It depends on the product, thickness and humidity. Thin coats of lightweight spackle can dry quickly, while joint compound often needs several hours or overnight. Check the label.
Can I paint straight over spackle?
Prime it first. Unprimed patches often look dull or different from the rest of the wall.
What's the difference between spackle and joint compound?
Spackle is designed for small holes and dries quickly with little shrinkage. Joint compound is used for taping seams and larger repairs.
This guide is general information. Follow the manufacturer's instructions and safety advice. If you're unsure, call a qualified professional.